Read Time 368 minutes
Creating Your first Email Campaign with Zoho Campaign
Name your campaign
- On the Welcome page, click the Create Campaign button.
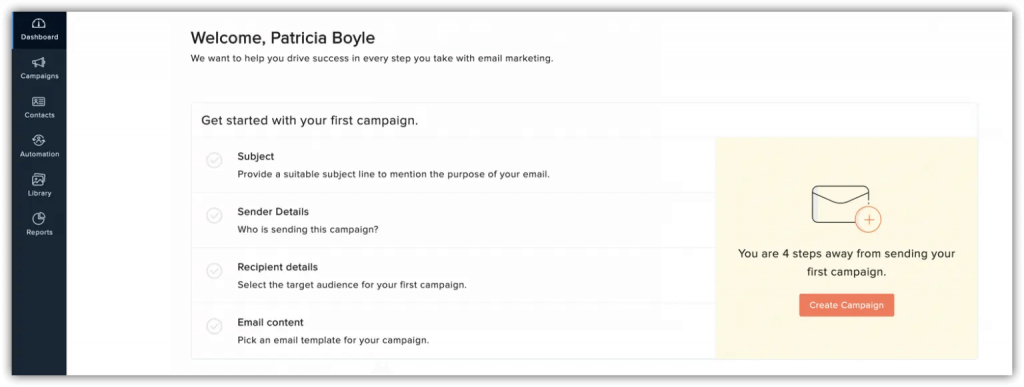
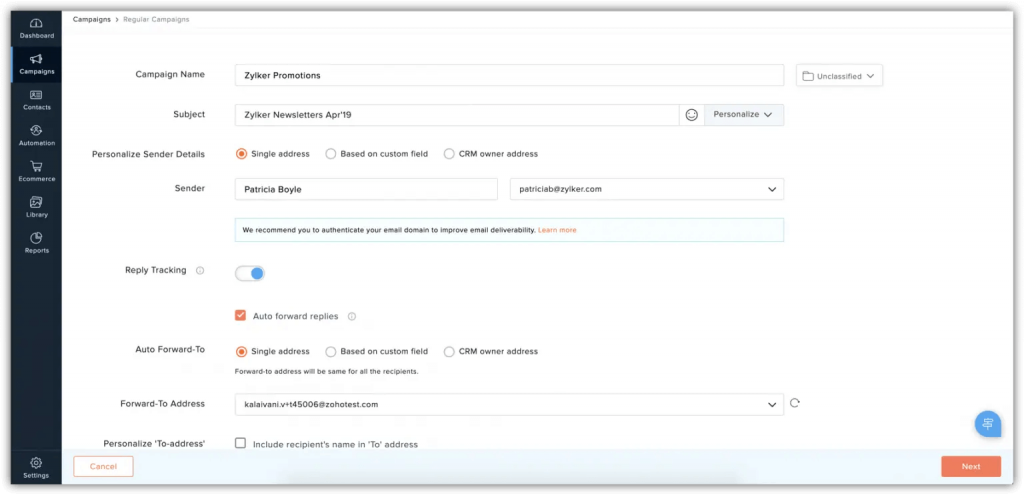
2. The Basic Info page will open. Enter these details
- Name – Select an easily recognizable name.. For instance, if the Zylker company is sending a monthly newsletter, name the campaign “Zylker Newsletter June 2015”, or something similar.
- Subject – Come up with a clever or eye-catching email subject line. A great subject line is going to draw many more readers than something boring and dry.
- Sender Name and Email Address – Give a name and email address that your recipients can recognize easily. The name could be your company or brand name.
- Reply tracking – Using Reply Tracking feature, you can keep a record of replies received for your campaigns. By default, reply tracking is disabled for all email campaigns. You can enable reply tracking for a campaign while creating the campaign.
- Address recipients by name – Personalize your recipients by addressing them by name.
- Use sender details from Zoho CRM – If the recipient was imported from Zoho CRM, you can personalize the sender name based on which user owns the account in CRM.
Email body and content
Zoho Campaigns provides some pre-designed email templates for you to use. Just pick an email template that meets your needs, then make some modifications to personalize it for your company’s voice.
If this is your first email campaign, we recommend starting with the basic templates. In addition to selecting a template, you can use the Template Editor to add design elements, such as images, text, buttons, anchor tags. Customize the layout of your emails with ease, using the drop down feature.
- HTML Editor – Select this if you want to send your campaign with visual images and logos. The recipient of your campaign must be using a browser/email client and device that support this format.
- Text Editor – Theses are simple emails without images or logos. The purpose is to send your message without losing any content. Plain-text emails have a very high degree of deliverability (no lost content).
- Import/Upload – With this option, you can import the HTML content for your email. Browse and select the HTML file as well as any related images, then upload them. You can either import from your desktop or from cloud services such as Zoho Docs, Google Drive, Dropbox, etc.
- Recently Sent – If you have already sent email campaigns, you can use the content from a previous campaign as a templates for your new campaign

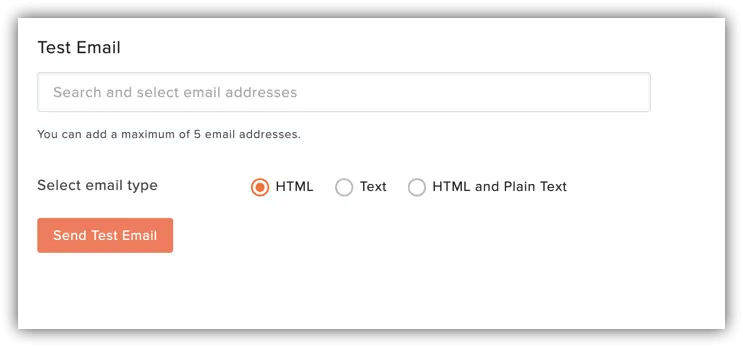
Preview and test your email
Before you send email newsletters to your subscribers, read it aloud to yourself several times. Then, send a test email to a few of your colleagues for review. Ask them to proofread the email, check for grammatical mistakes, alignment issues, and test links to verify that they are redirected to the correct page.
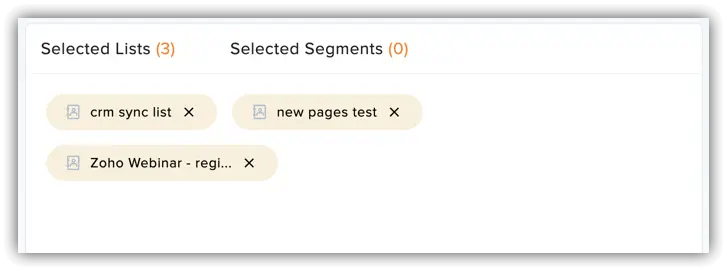
Select your email recipients
To send your campaign, you need a list of subscribers receive the emails. If you have your subscriber database saved in your desktop or on a Google spreadsheet, you can import those subscribers and save them as a mailing list.
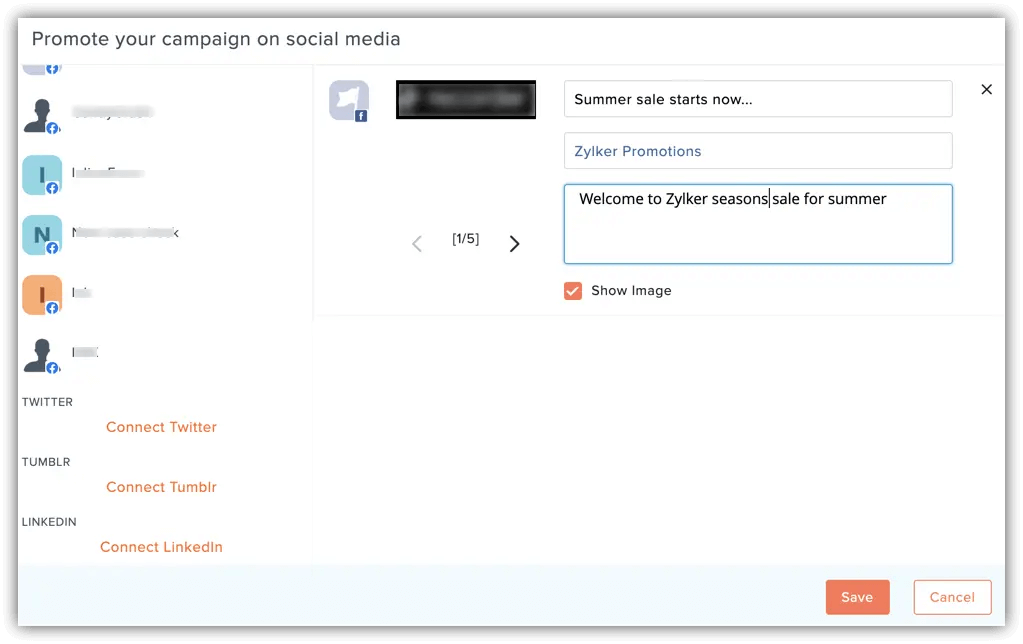
Promote your campaign on social media
Advanced options
- Track URLs using Google Analytics – If you want to extract more data from your email campaign, make sure Google Analytics is selected. If you know how many people open the email campaign and how many of them click the links, you’ll have better insights into what works and what doesn’t when you send your next campaign.
- Character encoding – Select the appropriate character encoding to match your language script.
- Header and footer themes – Add background color, change the font style/ size, and personalize the header and footer for your email campaign by selecting a theme from the dropdown menu.
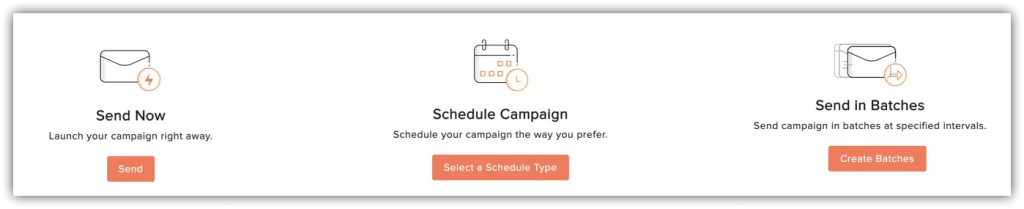
Sending your email campaign
Before launching your email campaign, use the Send for Review option to ensure that your email campaign reaches the recipient’s inbox, not the spam folder. Our compliance team will check your subject line, mailing list, and content for anti-spam compliance.
Additionally, try to figure out the most opportune time of day and week to send your emails. Test your campaign out and analyze the results to find out what time of day will bring you the most exposure and attention.
Measure campaign results
Assessing your campaign results will help you optimize future emails. Start with monitoring the real-time data such as opens and clicks. Based on this data, analyze what went right and what didn’t. Figure out some other things to try for your next campaign.

You can monitor and get information on the following data:
- Total number of emails sent
- Total opens and clicks received
- Total number of unsubscribes and complaints
- Campaign reach on social media
- Campaign opens based on location
Once you have several campaigns under your belt, this data will help your targeting strategies become more refined and effective.